Sunday, March 22, 2015

Noah

If you looked at the previous post, you would see sitting on my desk this picture.  I thought I'd give you a close up of it.
This is my boy!  We were doing what you do when you go to Walmart - trying on hats! 

My first step was to lay down the ink.  When I draw people, I generally skip the pencil step and just jump on in with the non-erasable stuff.

Once I had the design laid out I went to the watercolors.  My style, as you can see, is not a color within the lines type of style.  If so, I would take photographs and not paint.


The most time-consuming portion of this painting was definitely laying down the drawing.  It took me only a few minutes to lay in all the paint, wet and wild.  Then came the wait time - had to let it dry overnight.  Once I was at that point, I took in a fine brush for just a few details.  I think I'll call this one 'Noah.'

Friday, March 20, 2015

Continuing Sage of the Artist's Desk

Here we are again, sitting at my desk.  I've just finished some big paintings, actually about five.  Plus a couple of duds that we don't want to talk about.Yesterday I purchased four more frames and have quite a lot of framing under glass to do, one of my most difficult jobs.

In the meantime, it's finally time to play.  I sat down yesterday afternoon and decided to do some fast watercolors.  I guess one of my favorite mediums is pen and, let's say, watery paint.  In this case, it's watercolors.  Each of these began in a similar way.

Inspiration.  Need inspiration.

When I need inspiration, I often go to my picture files.  In the case of the clarinet, I have a commission to paint a tuba for someone, and it spurred me to the idea of doing an entire series of musical instruments.  Hence I've been collecting pictures of same.
This is my first musical instrument anything, and it took me I guess a couple hours.  Steps - pencil - adjust - pen - watercolor - hot pink paint pen.  At that point, I needed some more darks, so laid down a lot of blues and greens in the negative space behind the clarinet.

After that I looked at a pile of photos of family and travels.  Found this fun pic of Noah trying on a hat in Walmart.  He looked so ornery and cute that this was an easy one to choose.

This one came out fast.  I began with pen and went straight to color.  I concentrated the detail on his facial features - those that you can see - because I wanted you to look at the eye first, then face, then around the shoulder and arm, then back 'round again.

You can see my little tiny field sketch watercolor box up at the top.  I prepared a lot of watery color, wet the paper thoroughly on both sides, and laid the paint down in literally a minute or less allowing it to bleed all over.  I've never been a 'paint inside the lines' kind of girl.  Boring.  Once I had all the watery paint laid down, I took Saran Wrap and laid it on top, wrinkling it up to give that effect on the paper.  Set a few books on it and let it dry all night.

What else?  A couple photos in waiting for some more fast fun...  Oh!  the striped purse full of markers - yep.  I buy things just because I like the colors and patterns.  Snagged that one at Target.  Toilet paper... who doesn't have a roll on their desk at all times? :)

Tuesday, March 17, 2015

Second to Final Bike

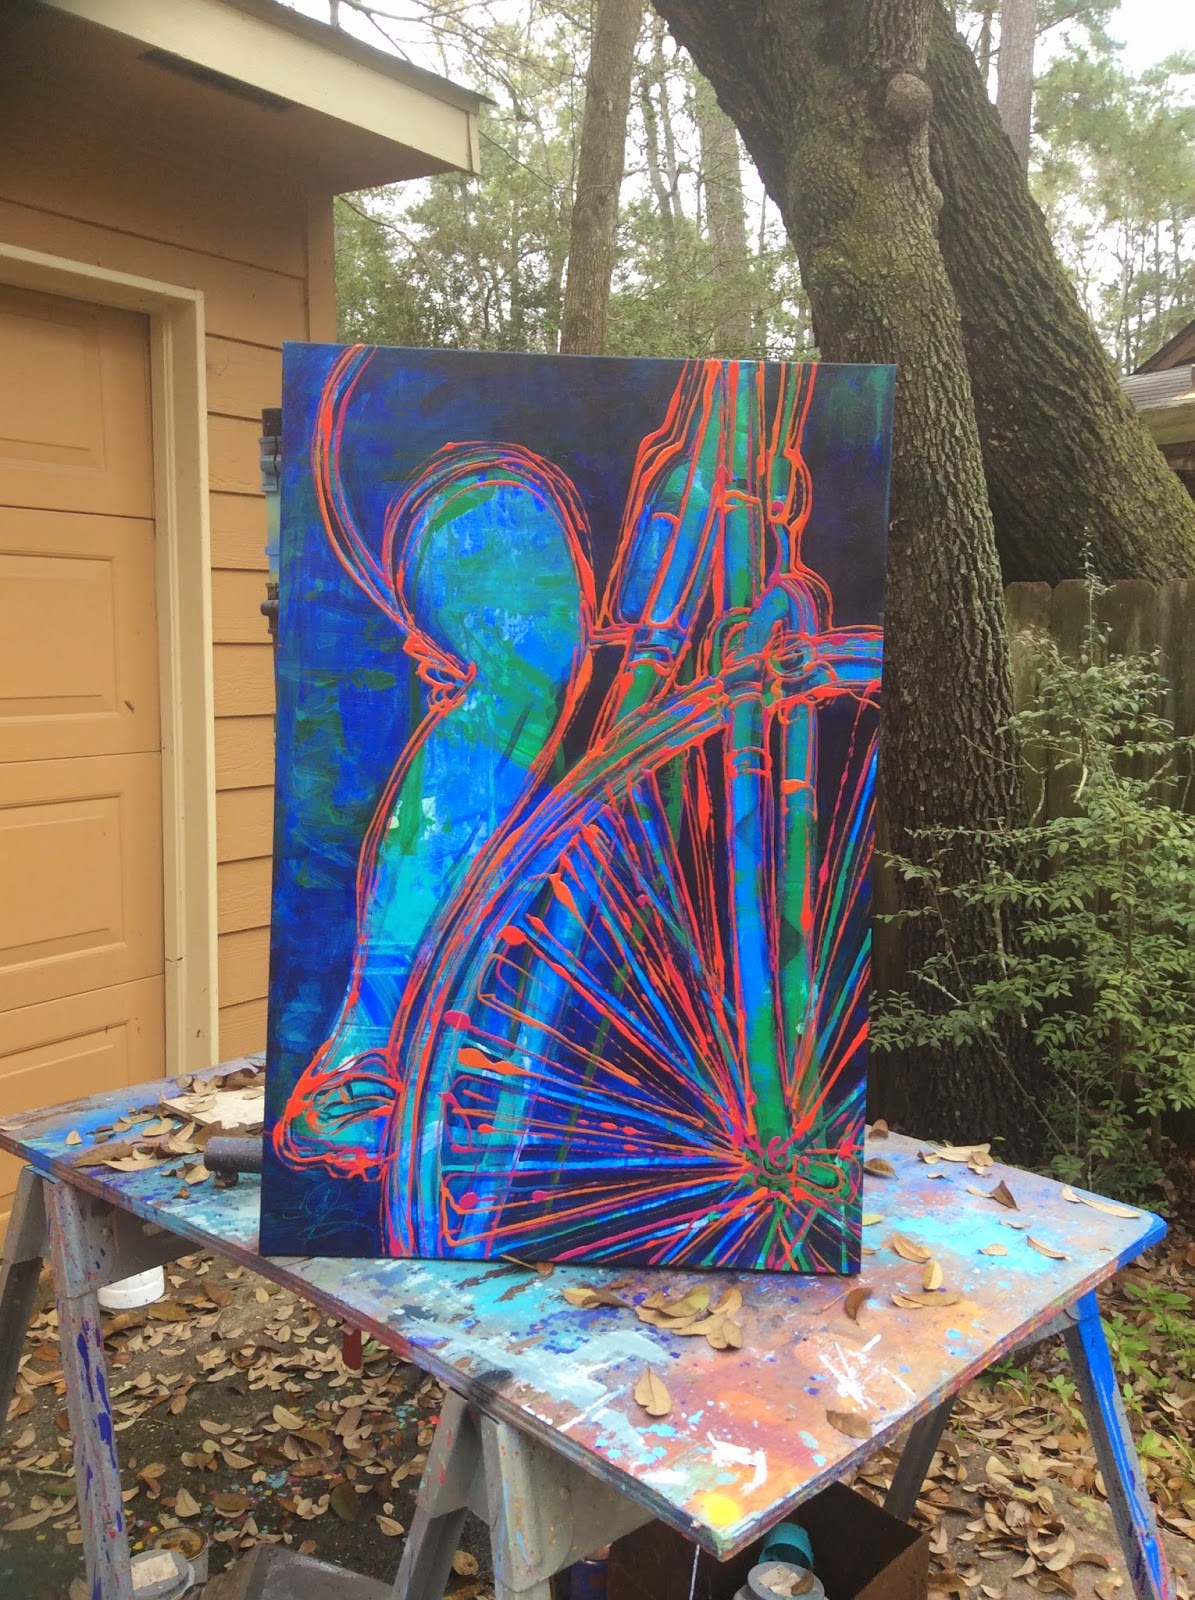
This was the painting when I had finally finished up laying down the details and building the backgrounds up.  Unifying it was very time consuming this time.

You can see in the background the photos of me on my bike.  This is normal working procedure for me.

NOW, it's time for the fun stuff!

These posts were a little backwards, look at the next post and you will see my final.

Final on Bike

 Just finished this one  *whew! *  It's a crazy, hot ride, and quite big; I think it's 24x36.

If you look closely, you can see that all the cool colors were laid down first.  Well, actually FIRST I had Noah take about 23 pictures of me on my bike!

The selection process went on for some time.  Once I narrowed it down, there were a number of sketches on paper to decide exactly which part I wanted to focus upon.

Once I'd chosen the pictures I wanted to work from, I laid down the blues, greens and turquoises.  My goal was to paint in the negative space, AROUND the subject, leaving it wild and colorful.


Allowing the first layers to dry, I took charcoal and drew in the bike and my leg.  The charcoal drawing took me several days as it was exacting.


 I think I worked on it for a week or two to get exactly the negative space I wanted painted in, bringing the subject forward and having the background recede.  As you can see, there are parts of the background darker than others, to make the painting more interesting.

At this point, adding shadows took several days as well, and unifying and finessing the entire painting.  I probably spent a week on it.

At the end, I added layers of oranges, reds and hot pinks in focused drips to give movement to the painting. Believe it or not, it's pretty difficult to make the drips look as though it was easy laying them down!  As these are all warm colors, they seem to float on top of the blues which adds to the depth.

Here I have close ups of several portions of the painting.  I like it!


Thursday, March 12, 2015

An Artist Desk, Continued

Here we are again looking at my desk.

I guess the most obvious is the bright pink sketchpad.  Last week I taught my two youngest groups of classes about Japanese gyotaku.  Gyotaku is an art form that developed from fishermen that wanted bragging rights!

The Japanese fishermen would take out ink and newsprint, or simply newspaper.  When they caught fish they liked, they would ink them, lay them on the newsprint, and voila! Fish prints!

The other way of doing it was simply to lay the fish on a newspaper.  The cheap, watersoluble ink would stick to the fish, and a negative space print would be made.  Fishermen would hang these on their walls to show what big fish they caught.  Today, gyotaku has become an art form.

Because I didn't want to use real fish for my sometimes squeamish students, I purchased a very nice bluegill, meant specifically for this project.  They came in many choices, but bluegills always make me happy.  After classes, I had two fish prints left, and decided to stick them into my brand new sketchpad.  One is on the inside cover (I have a deck of art cards weighing it down).  The black one you see I had done on tracing paper.  Because I enjoy layers, I wrote on the paper, then adhered the fish on top, adding paint as I progressed.

There's a little sketchpad on the right with monkeys in it.  A friend of mine is making a baby blanket and these monkeys are the main pattern.  You can see little strips of scattered material that will enhance it.  It'll be adorable.

Two new on-sale stencils on the far left.  Use these with my classes and big spray-paint-in-the-driveway events.

Top left, a picture for my picture file.  Like most artists, I have LOTS of reference material.  When I saw her I got a nice idea for painting a girl with flowers in her hair.

I've got a tiny box of Conte crayons at top; thinking about this for classes next year.  Around this time of year I start experimenting for next school year.  I've got kids that come back to me year after year, and they know I change everything so they can do so.  Art!  Such a deep and wonderful thing to go into!


Wednesday, March 11, 2015

An Artist's Desk


After sitting down at my desk, I decided you might like to see what's happening in my studio.  Here's a typical day for my desk.

First you see four little cards upon which I've drawn with pens.  I've been painting backgrounds on large sheets, cutting them up, and sticking them in my purse.  When I have a moment in a waiting room or who knows where else, I'll whip out a little card and begin to draw.  I like having the backgrounds done first; makes it much more interesting.

You can see the top little card is birds on a wire; I just finished three birds on a wire paintings, and this is a continuation.  Haven't finished this little card yet, I wanted my classes to see the background first.

The second card is the front of the Portofino Plaza.  I was sitting in the car waiting for Noah to finish his dancing.  And then birds, and more birds.  I like both the bottom ones and will likely make big paintings out of them.  These little cards are a safe way to explore ideas, and they often lead to bigger paintings.

What else? The little brown sketchpad.  Always.  One in my purse.  Always.  Gotta keep my chops up.

The little container with the lumps in it is brush cleaner.  Almost gone.  Invaluable stuff.

You'll see a brush on the right with tape around the non-working end - that's charcoal.  I tape charcoal to a brush to lengthen my arm, and to keep my hands clean.  When I had to get the curve of the wheel correct, I needed to lengthen my arm so I could turn my body into a fulcrum.  I positioned (maybe) my elbow off-canvas and used my arm like a big compass.

The tape measure?  That goes with the painting below.  I'm working on a series of bicycles now, as I LOVE riding.  Put in 13 miles yesterday since the rain finally stopped.  I think I was using the tape measure to get the spokes straight.  This painting involved a LOT of proportions and measuring.  Whew!

Oh - I'm looking back at the desk again and see photographs of bikes.  This involves my working method.

Step 1 - Had Noah photograph me on my bike outside in the driveway.  He took about 30 pics before we realized there was a problem.  At least one foot was on the ground.  No action.

Finally we got the idea for me to lean against the house with my hand, and have Noah practically lay down on the cement, and the pictures immediately got better.  I worked from the best three.  You can see that I tape photos up on my bookshelf - that's very typical.

You'll see more of this painting later as it progresses toward finish-dom.  It's time to add the movement.

Wednesday, February 18, 2015

Final Painting, Cutter, Part Eight

l
Here's the final painting.  I'm still deliberating over a couple titles,
'Always There,' or
'Reach.'

Going to have to think about that for a while.

This was a really painful painting to produce, and I'm so glad that it's done.  You can see the previous six or seven posts to see the steps involved, but I'll synopsize it here for you.

Pain.  In all honesty, it began last year with a lot of pain.  You can dig into my past posts from March on and find the details of it, but I really don't want to go into it again right now.  I'm going to keep to the specifics of the painting.

I wanted to paint a picture of Hope.  The Hope we have in Christ.  We get ourselves into all kinds of trouble, as this person here would indicate.  You can see the footprints on the painting - he's been stomped on, too.

We can get buried in sin and pain, and it's really difficult to see past ourselves.  It's pretty easy to forget at those times that there is Someone who is always there, ready for the call.  All we need to do is call upon him.

The arms are Christ's arms.  There is no mire too deep that He cannot pull us out.  The heavenly gold symbolizes his holiness and perfection, spilling down over the sinner.  If you look closely, the would in Jesus' hand is dripping dark blood, which, as it runs down the cutter's arm, turns to gold.  This, too, is a symbol of how his love and sacrifice for us covers all.

All we need to do is reach out to Him.  He's there waiting.